
A few weeks ago I posted on installing a compass in my kayak. This month I installed a bilge pump. I actually started when I put in the compass, but saved the post until now. As we say in the old sod “may as a well get hung for a sheep as a lamb”. In other words if I was going to cut one hole in my kayak I may as well cut two and get all my projects over with. The pump really only needed one hole, an outlet, for what is commonly known as a thru-hull-fitting. This is where the water goes out and in theory none comes back in! I did a search and found the following links with information on similar projects. As always I like to see how other people did it before I proceed.
This is a great blog and I found it very useful. The photo were very helpful and gave a good sense of what I could expect when installing mine.
Installing a foot operated bilge pump
Nice PDF on the entire install process. Many different kayaks are shown, but all are related. I also read that turning the kayak upside down and working from under it is the only way you can actually do this sort of project.
This company only talks about installing a pump in a new kayak, but what a sweet looking boat. If I ever get to Australia I will buy one!
The choice of pump came down to two (very quickly). One was out of the UK and way too much money, the other was from down the road in Rhode Island. The choice was easy and I pick up the phone and called The Bosworth Company in East Providence, RI. This was clearly a small manufacturing firm how wanted to take care of every customers needs. I was greeted like a long lost friend and once I explained what I wanted to do the sales person filled me in on all details and make several recommendations. I ended up ordering the Guzzler “450” Foot Button Pump, some hose, a one way valve and a strainer. A few days later it all showed up (very well wrapped) from the UPS man.
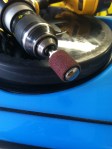
Drilling another hole in my kayak. Tools of the trade and the ends result.


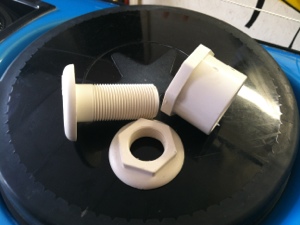
The through the hull fitting was the correct size for the hose I was using, but the shoulder was little thick so I need to make a spacer so the lock nut would tighten down on that kayak hull. Yet another trip to the hardware store produced a PVC fitting that was a nice fit on the thread and big enough so the nut would have plenty to bite on.
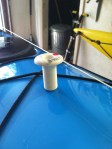
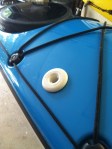
This image shown the thru-hull-fitting (right), its nut (bottom) and the PVC spacer fitting. Note the shoulder on the fitting where the thread ends toward the top.
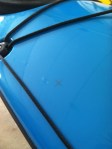
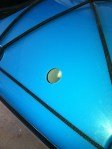
Here’s the fit up and finished product.


